Main Panel
This is the main panel of Bmesh Clean, it looks like this once the addon is installed, if the panel is not present , make sure you have installed the addon correctly and activated the checkbox. Here you can find how to install the addon correctly: Installation
Panel Types
From Bmesh Clean version 1.1.200 the panel can be set in 2 modes, classic or with checkmark, you can change the mode from the addon preferences, the default mode is classic, but you can change it to checkmark if you prefer Options.
Panel Classic Style

Panel Checkmark Style

Apply to Selected
Tip
1- To work correctly, the selected object must be a mesh object. 2- This button only works if the properties described here below are activated, as in the example image.
Once you have selected the settings you want to apply, you can press this button to apply the chosen settings.
You can select the objects to which you want to apply these settings, the button works on multiple selected objects without limits
Note
Selected objects that are not of type mesh will not be taken into consideration, so the settings will not be applied to them, as they are not mesh objects.
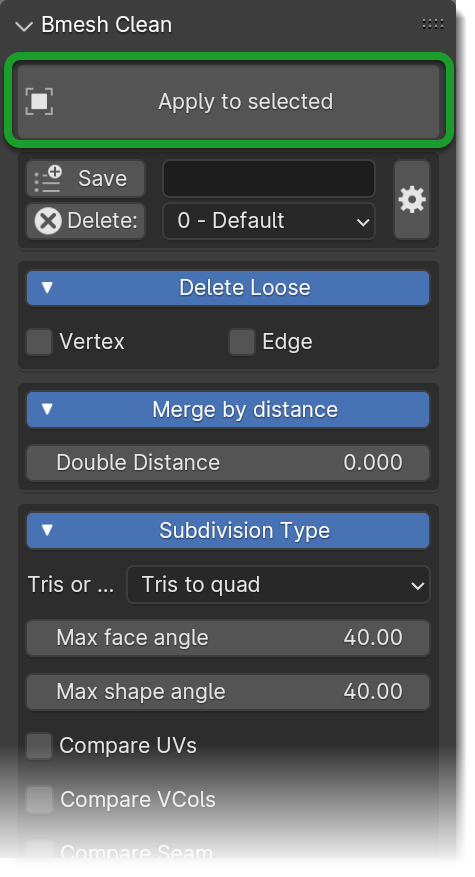
Save
This button saves the current preset so that it can be reused in the future, it needs a name before it can be saved.
Note
From Bmesh Clean version 1.1.200 the saving of presets has been changed, it is done in json files and they are saved in the Blender addon folder: ..Blender FoundationBlenderExtremeAddonsbmesh_clean_data, in this way the presets can be shared even between multiple versions of Blender, but the most important thing is that when you update BmeshClean, the presets are not lost as before.
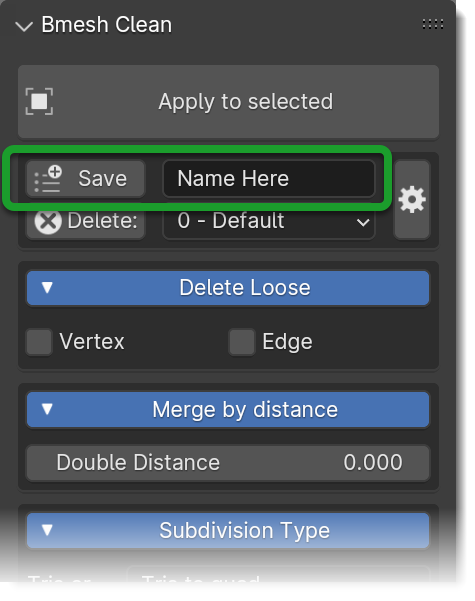
If a preset is saved with the same name, you will be asked if you want to overwrite the existing preset (Uppercase or lowercase letters do not make a difference)
Names containing characters not allowed by the operating system cannot be saved, for example: ‘[@!#$%^&*()<>?/|}{~:]’ will be automatically replaced with an underscore _
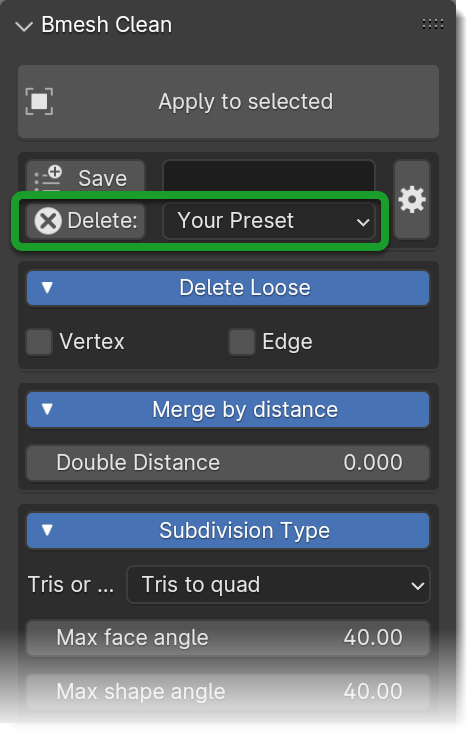
Delete
This button deletes the selected preset, provided it is a preset created by you and is selected in the preset list next to the Delete button.
Important
The Delete button will only remove user presets, not the default ones provided with the addon
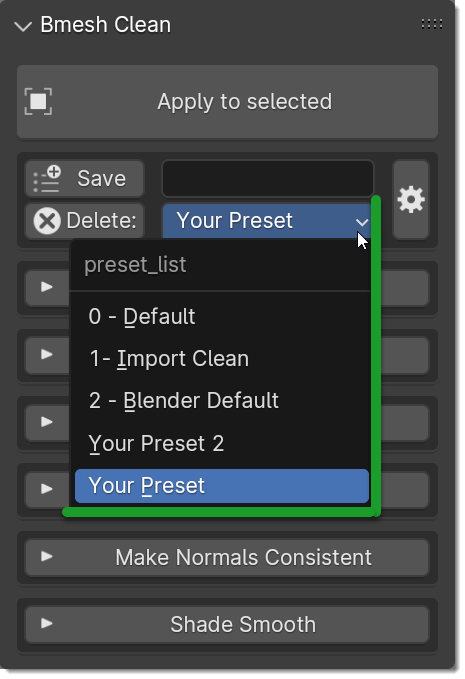
Preset List
By this selector, you can select the default presets or the ones saved by you, here all available presets will be displayed.
In automatic, when you choose a preset from this list, the addon automatically configures itself with the settings of the chosen preset, So it will be enough to press the Apply to Selected button to apply the settings of the chosen preset to the selected objects.
Open Preferences Button
This button will take you directly to the Bmesh Clean preferences, in the Options TAB
Note
The button is present only from Bmesh Clean version 1.1.200

The preferences are described in this section: Preferences
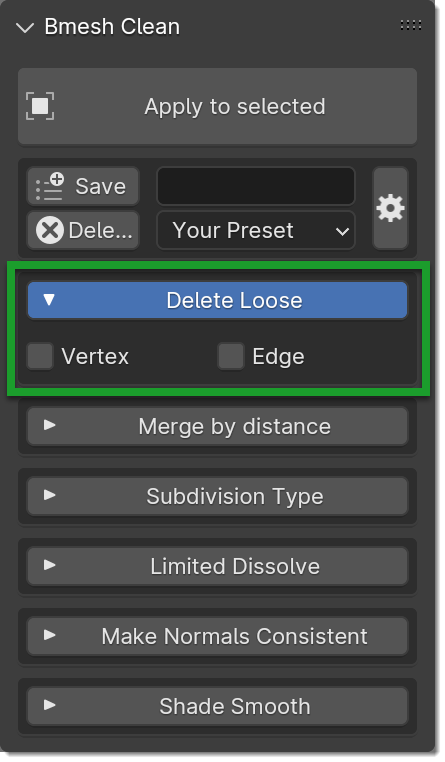
Delete Loose
This options removes disconnected vertices / edges
Here an example of disconnected vertices or Loose edge:
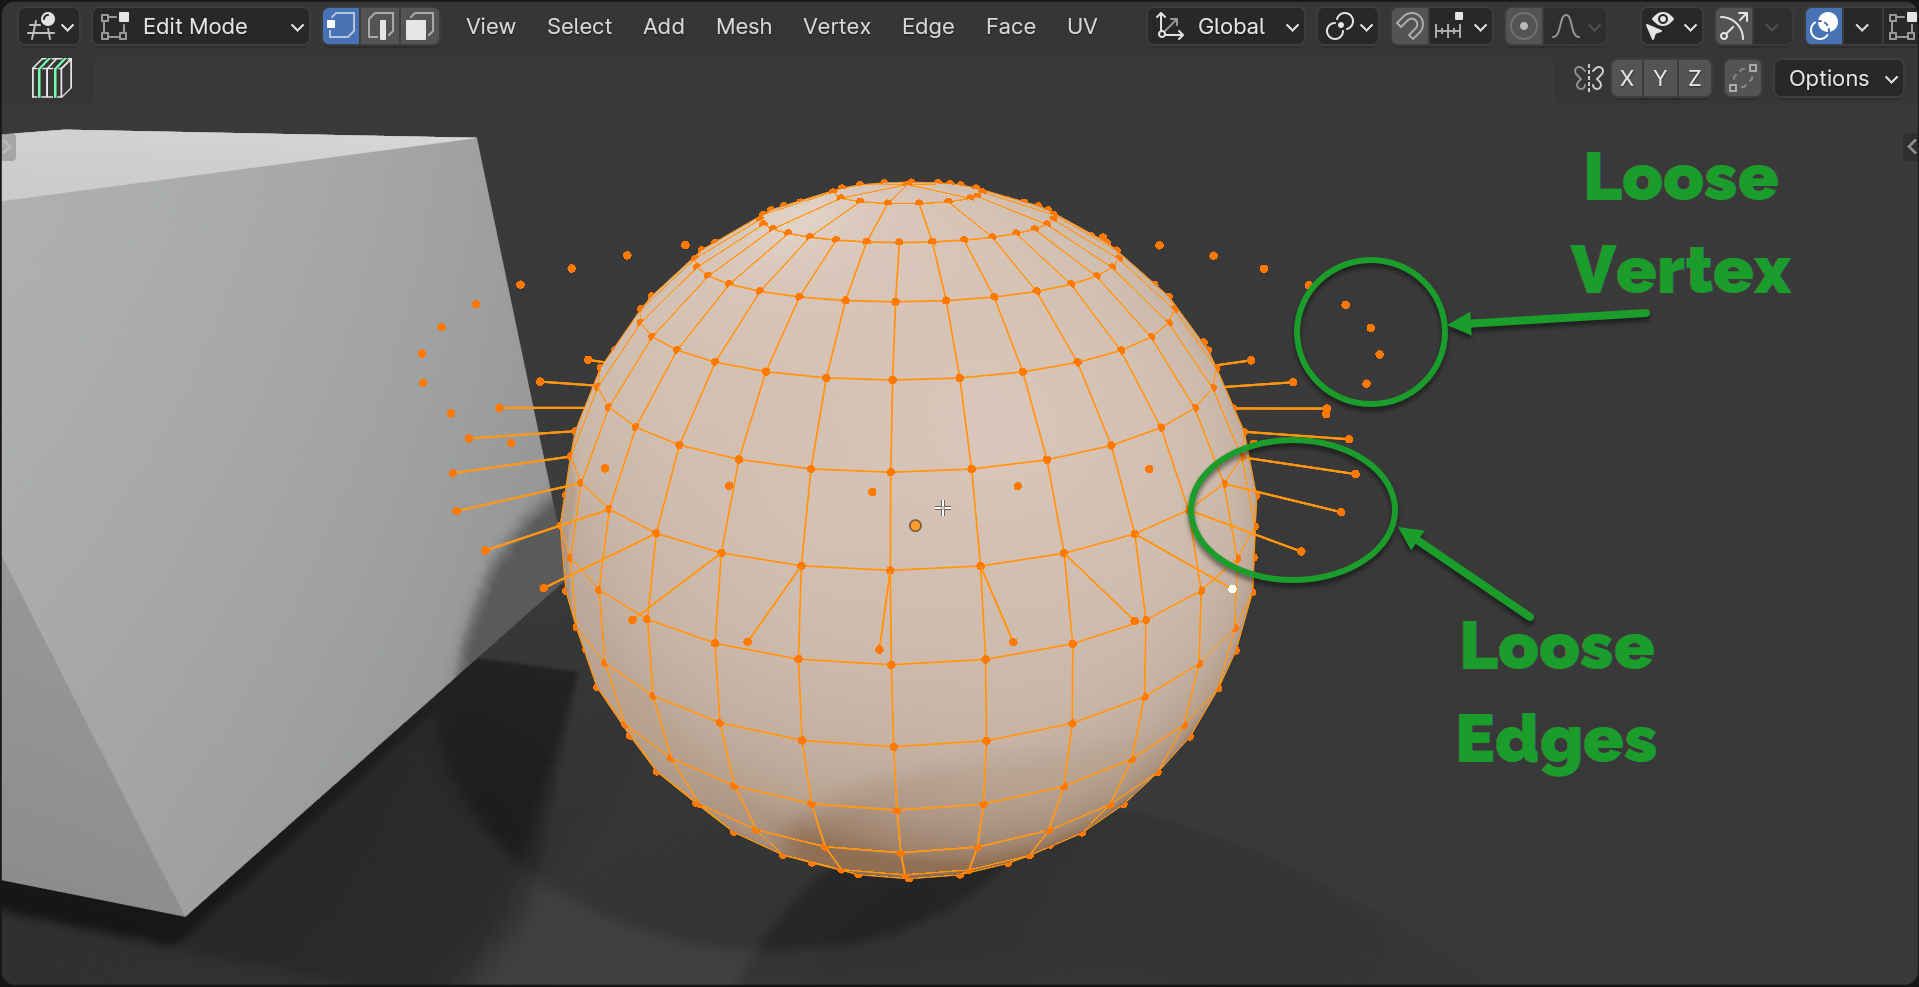
Vertex
If active, all vertices not connected to an Edge or a face will be deleted.
Edges
If active, all edges not connected to a face will be deleted.
Merge By Distance (Remove Doubles)
This option merges vertices that are close to each other, within the distance set in the field next to the checkbox.

Distance
This value represents the maximum distance between the vertices to be considered duplicates and therefore joined, one of the 2 or more vertices present in this range will be deleted.
The value is therefore the unit of measure of the Blender coordinate system, by default it is in meters, but it can be changed so a value of 0.001 represents 1 millimeter (If set in the decimal metric system)
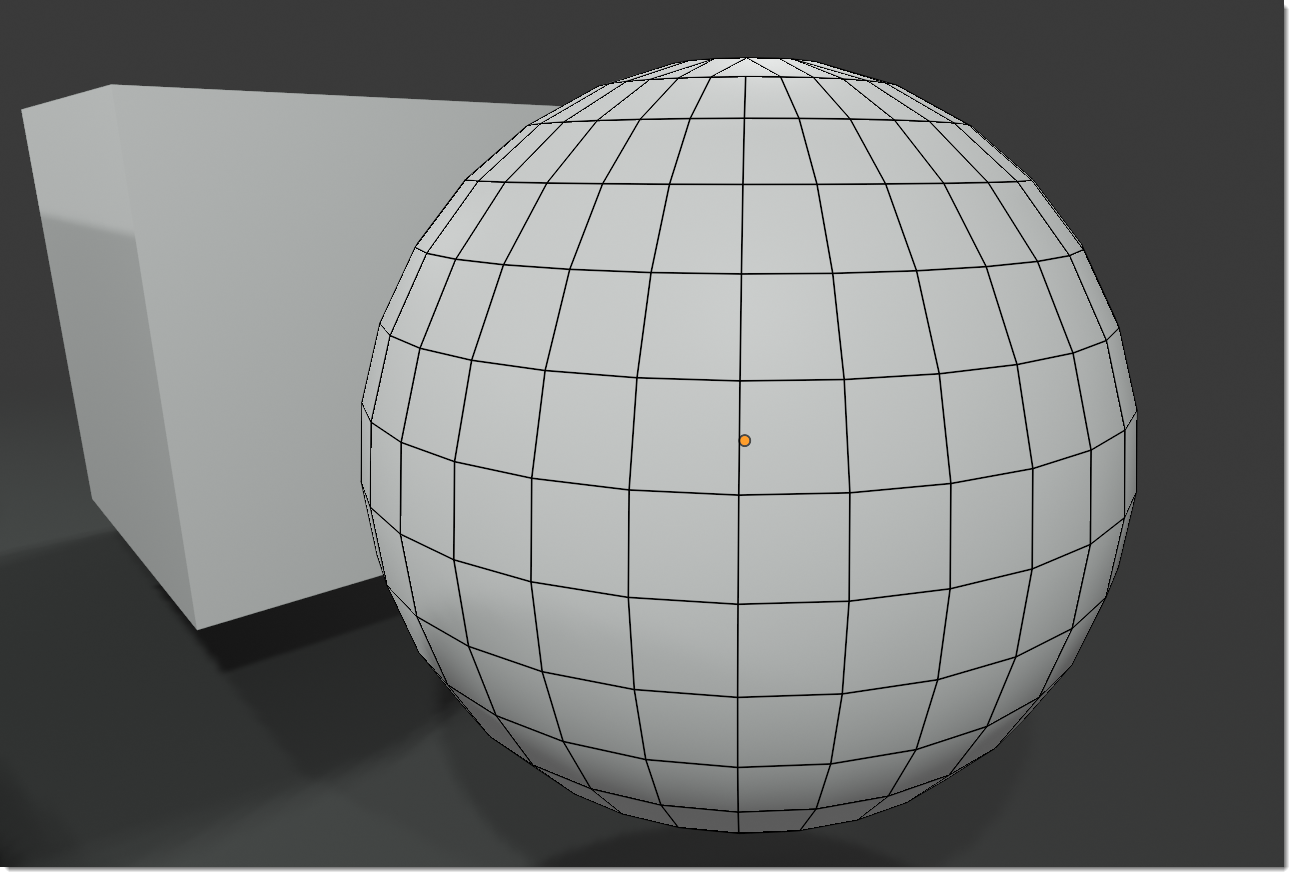
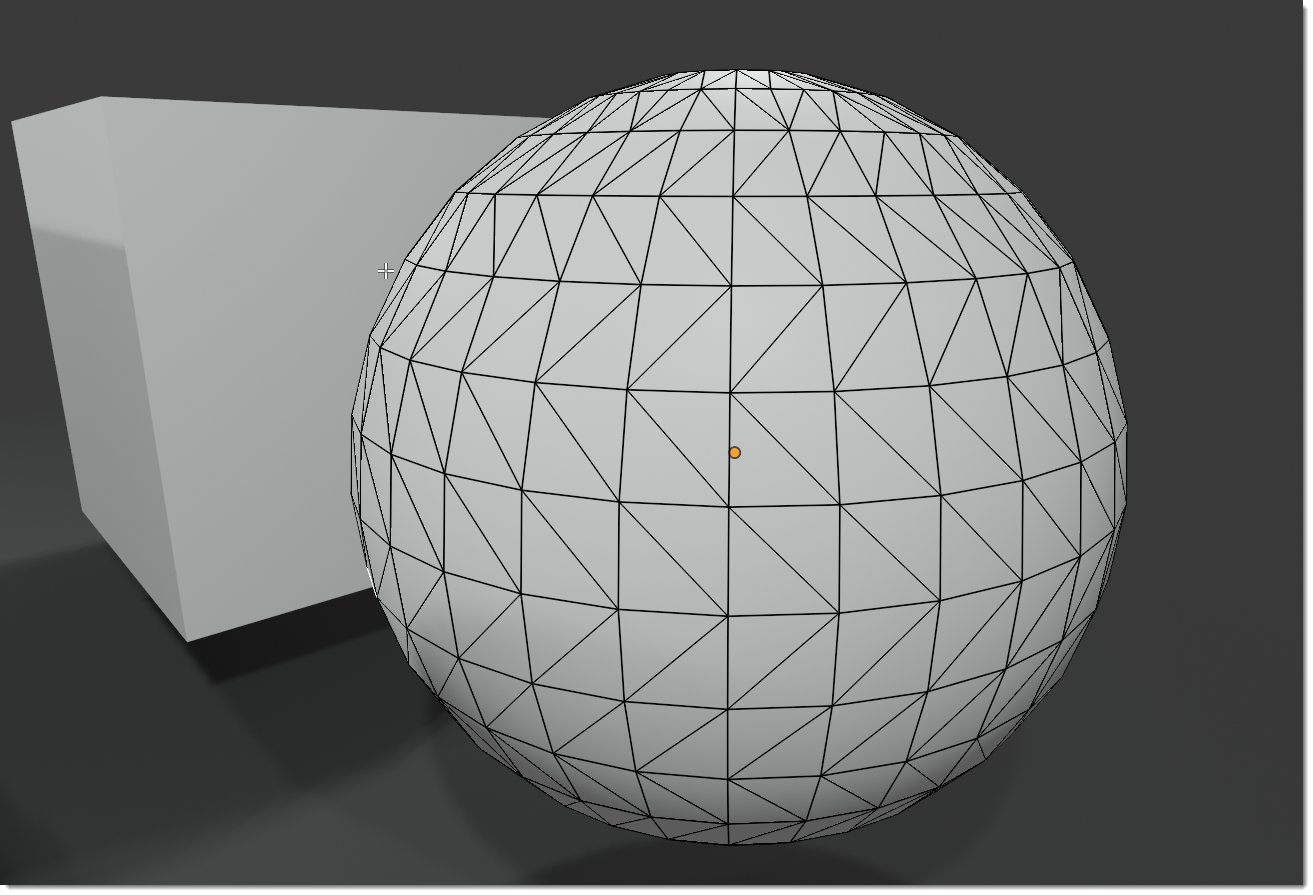
Subdivision Type
This option allows you to choose the type of subdivision to be applied to the selected objects.
This is an example of quad mesh:
This is an example of triangulated mesh:
Tris to Quads
The tris to quad mode is a mode that allows you to convert the triangles into quads, this is an example of the Tris Mode Mesh:
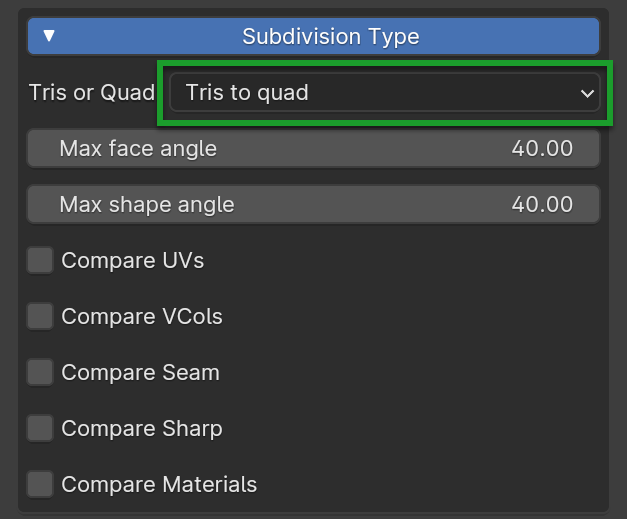
Max Face Angle
This parameter, ranging from 0 to 180, determines the threshold for the functionality of this tool on neighboring triangles. When set to 0.0, it will exclusively connect adjacent triangles that create a precise rectangle (such as right-angled triangles sharing their hypotenuses). Increasing values become necessary for triangles featuring a shared edge that is diminutive compared to the other edges of the triangles.
Max Shape Angle
This parameter is similar to Max Face Angle, but instead of considering the angle between the planes of the faces, it considers the angle between the planes of the faces and the planes of the adjacent faces.
Compare UVs
When activated, this feature inhibits the merging of triangles unless they are also adjacent in the active UV map.
Compare VCols
Enabling this option prevents the merging of triangles lacking a corresponding Color Attribute color.
Compare Seam
Once activated, this function hinders the union of triangles sharing an edge marked as a seam.
Compare Sharp
When turned on, this function obstructs the merging of triangles sharing an edge labeled as sharp.
Compare Materials
Enabling this feature restricts the merging of triangles that don’t share the same assigned material.
Triangulate Mode
The triangulate mode is a mode that allows you to convert the quads into triangles.
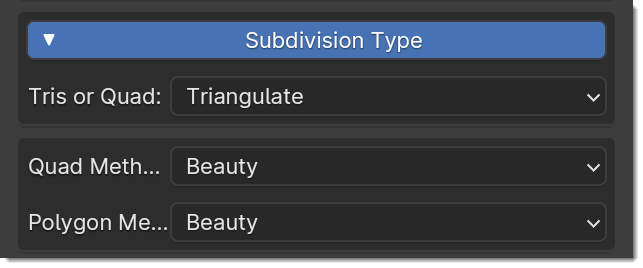
Quad Method
This option allows you to choose the method to use to split the quads into triangles, bello the available methods:
Beauty
Split the quads in nice triangles, slower method
Fixed
Split the quads on the first and third vertices
Fixed alternate
Split the quads on the 2nd and 4th vertices
Shortest diagonal
Split the quads based on the distance between the vertices
Polygon Method
The quad Method option allows you to choose the method to use to split the quads into triangles, bello the available methods:
Beauty
Arrange the new triangles evenly
Ear Clip
Split the polygons with an ear clipping algorithm
Limited Dissolve
Dissolve edges and vertices, constrained by the angle of the encompassing geometry.

Here an example of limited dissolve of a plane:

Max Value
This value represents the maximum angle that vertices and edges must have in order not to be dissolved.
All edges and vertices with an angle greater than this value will be dissolved.
All Boundaries
Dissolve all vertices inbetween face boundaries
Regular
Delimit by face directions
Material
Delimit by face material
Seam
Delimit by edge seams (Edge Mark as Seam)
UVs
Delimit by UV coordinates
Make Normals Consistent
This option, if activated, allows you to recalculate the direction of the faces of the model automatically, you can indicate whether to turn them inwards or outwards.

Orient Face
Inside : The normals of the faces will be oriented inwards
Outside : The normals of the faces will be oriented outwards
Shade Smooth
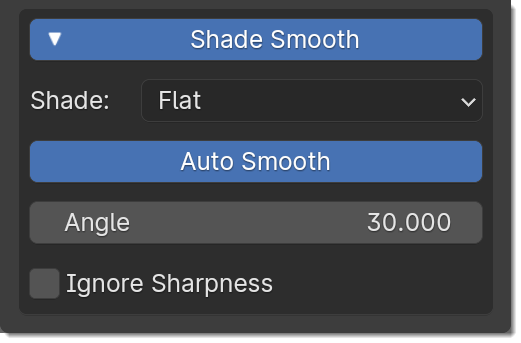
In this image an example on the right of Shade Flat (On the left) and Shade Smooth (On the right):

Shade Type Selector
This selector allows you to choose between Shade Smooth or Shade Flat (As in the example above)

Auto Smooth
The Shade smooth button, if activated, will smooth based on the angle set in the value below Angle
Suppose the value is set to 30 Degrees, all angles between the faces greater than 30 degrees will be smoothed, while all angles less than 30 Degrees will remain Sharp.
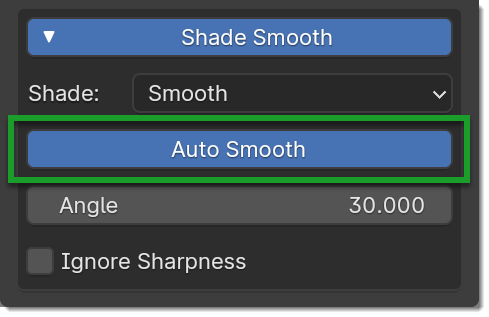
Angle
This value represents the angle in degrees, all angles greater than this value will be smoothed, while all angles less than this value will remain sharp.
Ignore Sharpness
Note
This option is available from Bmesh Clean version 1.1.200 and on Blender 4.1 or higher
If activated, the marked edges as sharp will be ignored, and the smoothing will be done based only on the angle set in the value above Angle